Getting to know the merchant portal
Step 1: Create an account
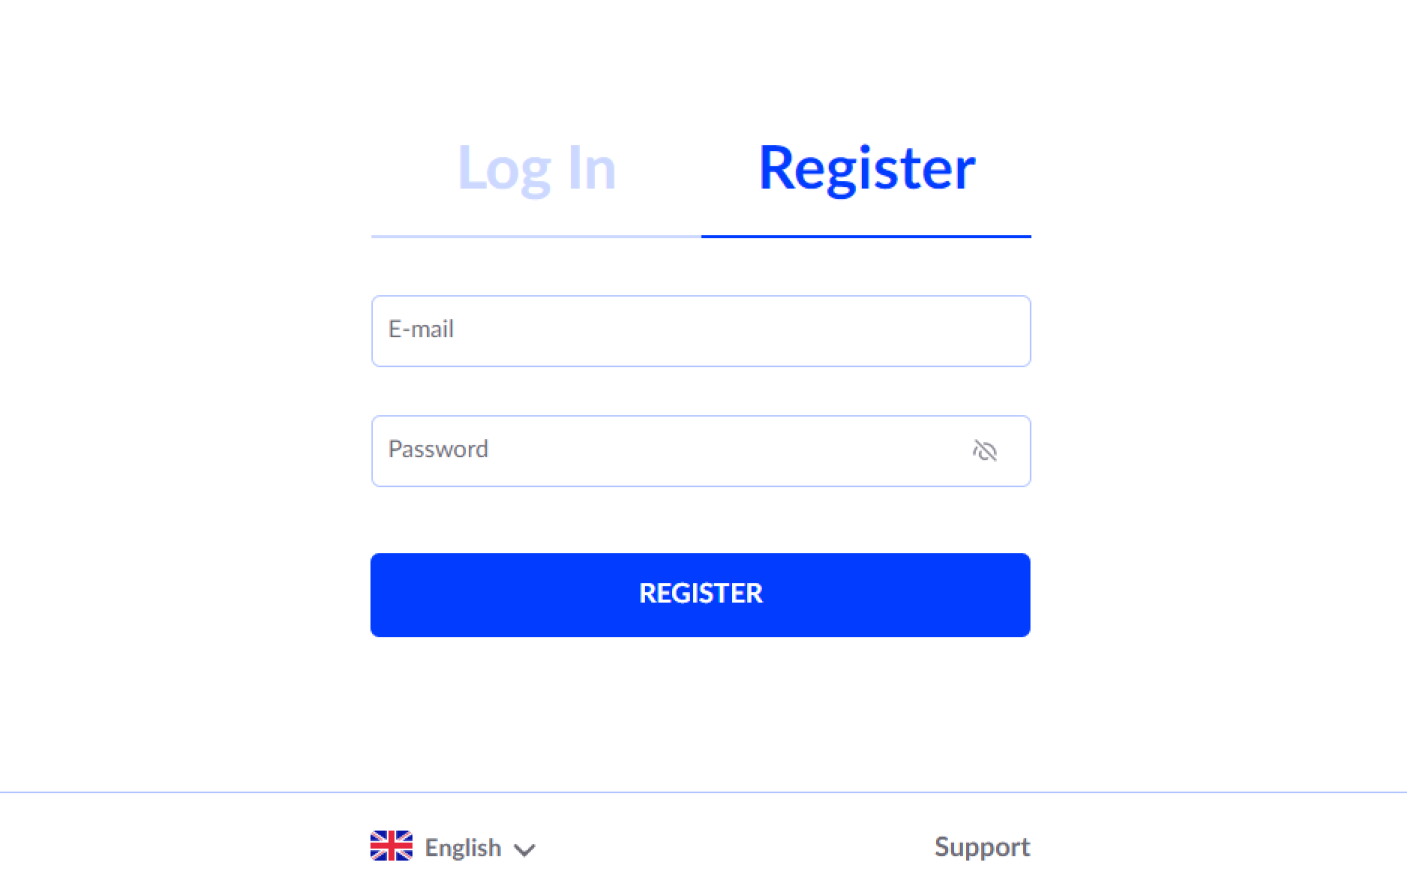
To integrate and continue working with our services, you need to create an account in the Financial Line merchant portal
Go to the registration page in the merchant portal.
Fill out the registration form: by providing your email address and setting a password.
Confirm your email
You will receive an email from Financial Line at the email address specified during the registration: follow the link in the email to confirm your email the link in the email to confirm your email address.
Once you have confirmed your email, you can log in to your account and start exploring the features available in the merchant portal.
As a user who registered an account you will automatically get the highest level of access (Account Owner role) and you can invite other users.
Step 2: Add other members of your team
In order for different specialists to be able to use the account and work on your project at the same time, you need to select a role with the appropriate access rights for each team member.
Go to the Team section
In your account settings, select Team as shown in the image..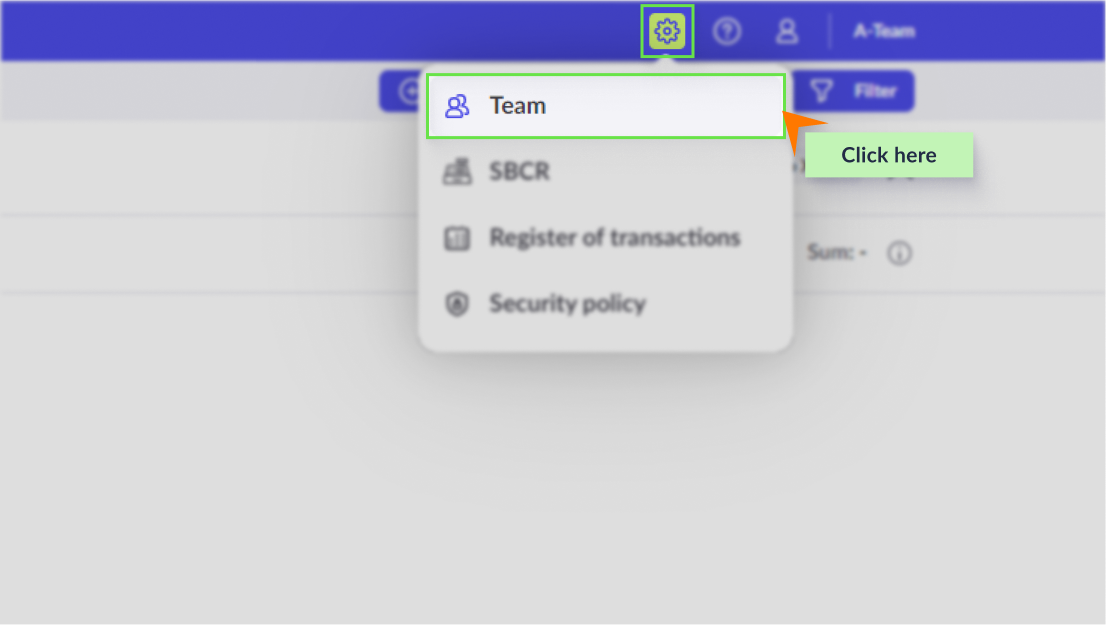
Add a new user
To do this, select an appropriate role and specify an email of the employee. A single user can have multiple roles. You can add no more than 10 users at a time.Make sure your team members register via your invitation link
Your team members will receive letters inviting them to join the team at the specified email addresses. To get access to your project, they need to register using the link in the letter.
In order to join the team, the user must complete the registration via the link in the invitation. If a person simply registers on their own, a separate merchant account will be created for them.
Step 3. Familiarize yourself with the test project and use its API keys
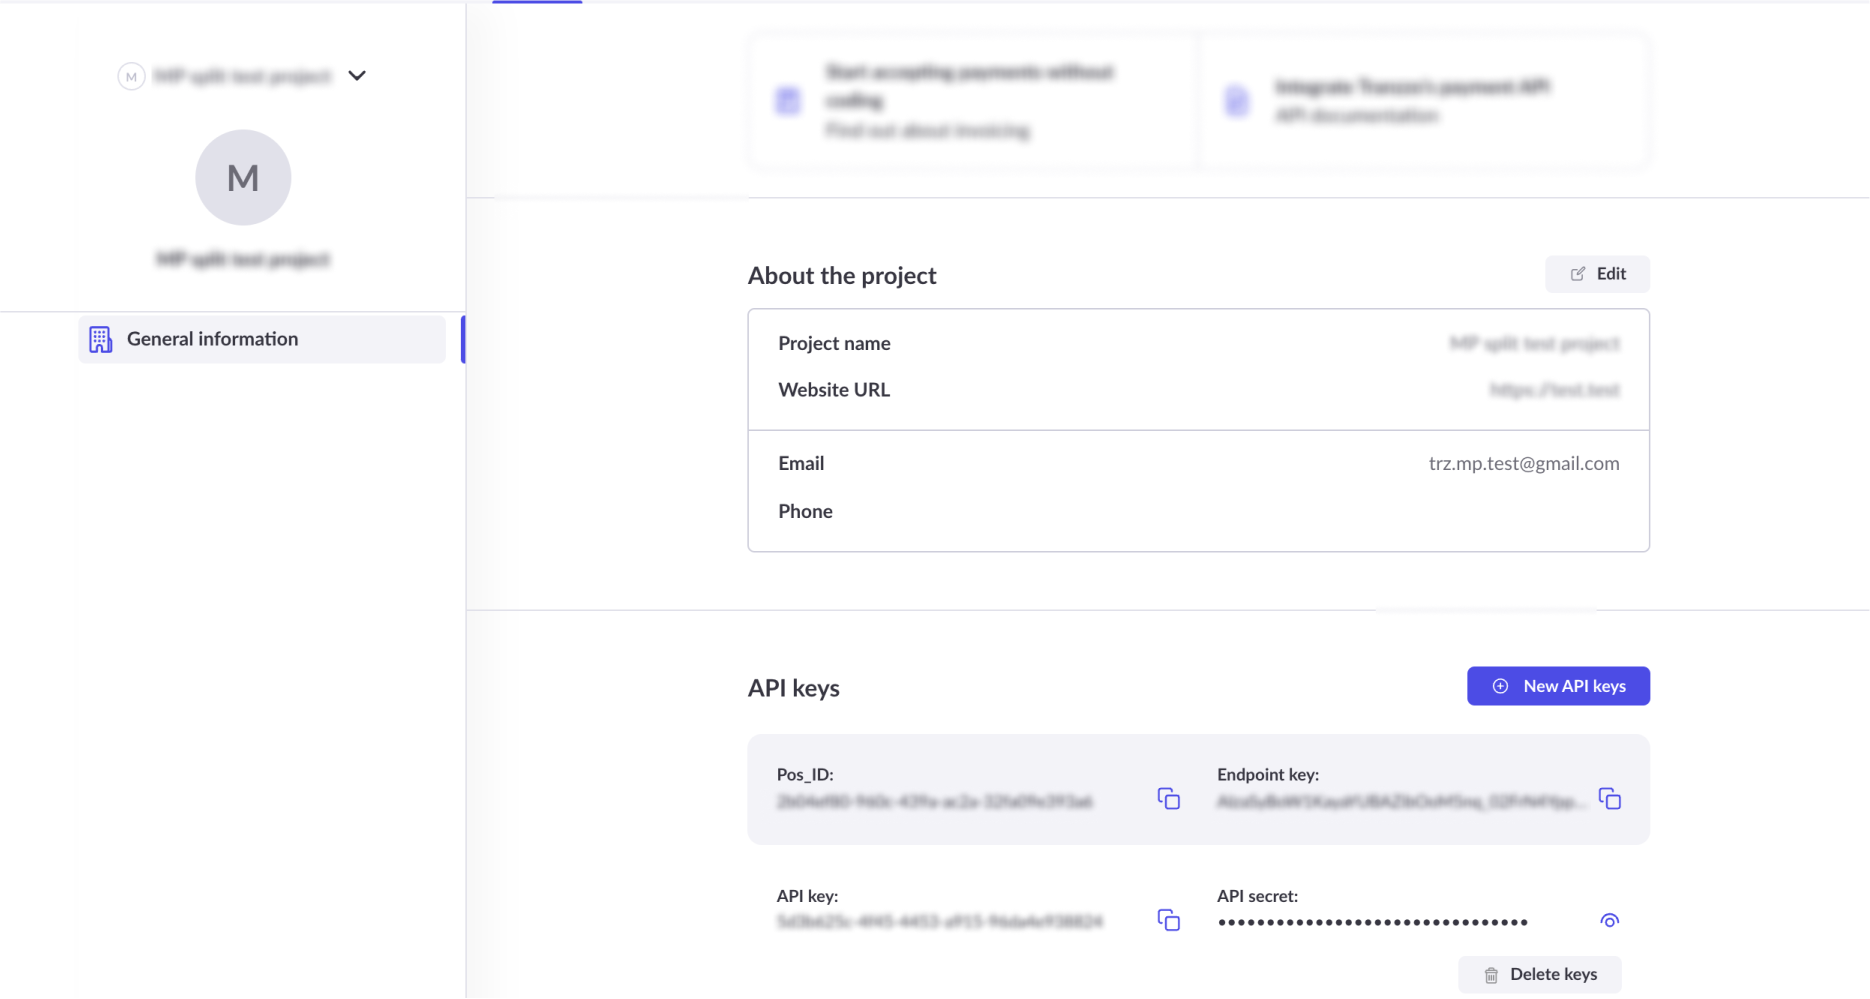
Each merchant account in the merchant portal has a test project which is available immediately after registration.
Where to find a test project
From the menu, go to the Projects section. There you will immediately see the test project as at this stage it is the only project in the account.
What opportunities does the test project provide
- Generate test payments through the payment link service.
- Carry out integration using test data: the authentication data (API keys) can be found on the test project page.
The test project cannot be used to accept payments from customers. Use it only to configure the integration.
You have completed Stage 1 of our integration checklist. What's next?
Before proceeding to the next stages of integration and making technical settings, read the requirements for using the Financial Line API.